Có khá nhiều bạn đang thắc mắc không biết làm thế nào để thêm ảnh đại diện và thay đổi số lượng sản phẩm trang thanh toán thì hôm nay mình sẽ viết bài viết hướng dẫn bạn làm chức năng này nhé, hãy cùng Mai Trung Kiên tìm hiểu chi tiết qua bài viết dưới đây. Let’s go
Thêm ảnh đại diện sản phẩm vào trang thanh toán
Bước 1: Bạn hãy dán đoạn code sau vào file function.php của theme bạn đang kích hoạt.
add_filter( 'woocommerce_cart_item_name', 'maitrungkien_add_image_in_order_review', 10, 3 );
function maitrungkien_add_image_in_order_review( $name, $cart_item, $cart_item_key ) {
if ( ! is_checkout() ) return $name;
$data = $cart_item['data'];
$thumbnail = $data->get_image( array( '50', '50' ), array( 'class' => 'maitrungkien-image-product-checkout' ) );
return $thumbnail . $name;
}
Sau khi thêm đoạn code trên bạn bấm Cập nhật tệp tin
Bước 2: Bạn hãy dán đoạn css dưới đây vào file style.css
img.maitrungkien-image-product-checkout {
margin-right: 8px;
}
Vậy là xong rồi nhé, chúng ta hãy xem thành quả của đoạn code trên, nếu bạn chưa thấy giao diện update thì bạn hãy xóa cache trang thanh toán vào load lại trang để xem nhé.
Code thay đổi số lượng sản phẩm trang thanh toán (Checkout)
Bạn hãy dán đoạn code sau vào file function.php của theme bạn đang kích hoạt.
// ----------------------------
// Add Quantity Input Beside Product Name
add_filter( 'woocommerce_checkout_cart_item_quantity', 'bbloomer_checkout_item_quantity_input', 9999, 3 );
function bbloomer_checkout_item_quantity_input( $product_quantity, $cart_item, $cart_item_key ) {
$product = apply_filters( 'woocommerce_cart_item_product', $cart_item['data'], $cart_item, $cart_item_key );
$product_id = apply_filters( 'woocommerce_cart_item_product_id', $cart_item['product_id'], $cart_item, $cart_item_key );
if ( ! $product->is_sold_individually() ) {
$product_quantity = woocommerce_quantity_input( array(
'input_name' => 'shipping_method_qty_' . $product_id,
'input_value' => $cart_item['quantity'],
'max_value' => $product->get_max_purchase_quantity(),
'min_value' => '0',
), $product, false );
$product_quantity .= '<input type="hidden" name="product_key_' . $product_id . '" value="' . $cart_item_key . '">';
}
return $product_quantity;
}
// ----------------------------
// Detect Quantity Change and Recalculate Totals
add_action( 'woocommerce_checkout_update_order_review', 'bbloomer_update_item_quantity_checkout' );
function bbloomer_update_item_quantity_checkout( $post_data ) {
parse_str( $post_data, $post_data_array );
$updated_qty = false;
foreach ( $post_data_array as $key => $value ) {
if ( substr( $key, 0, 20 ) === 'shipping_method_qty_' ) {
$id = substr( $key, 20 );
WC()->cart->set_quantity( $post_data_array['product_key_' . $id], $post_data_array[$key], false );
$updated_qty = true;
}
}
if ( $updated_qty ) WC()->cart->calculate_totals();
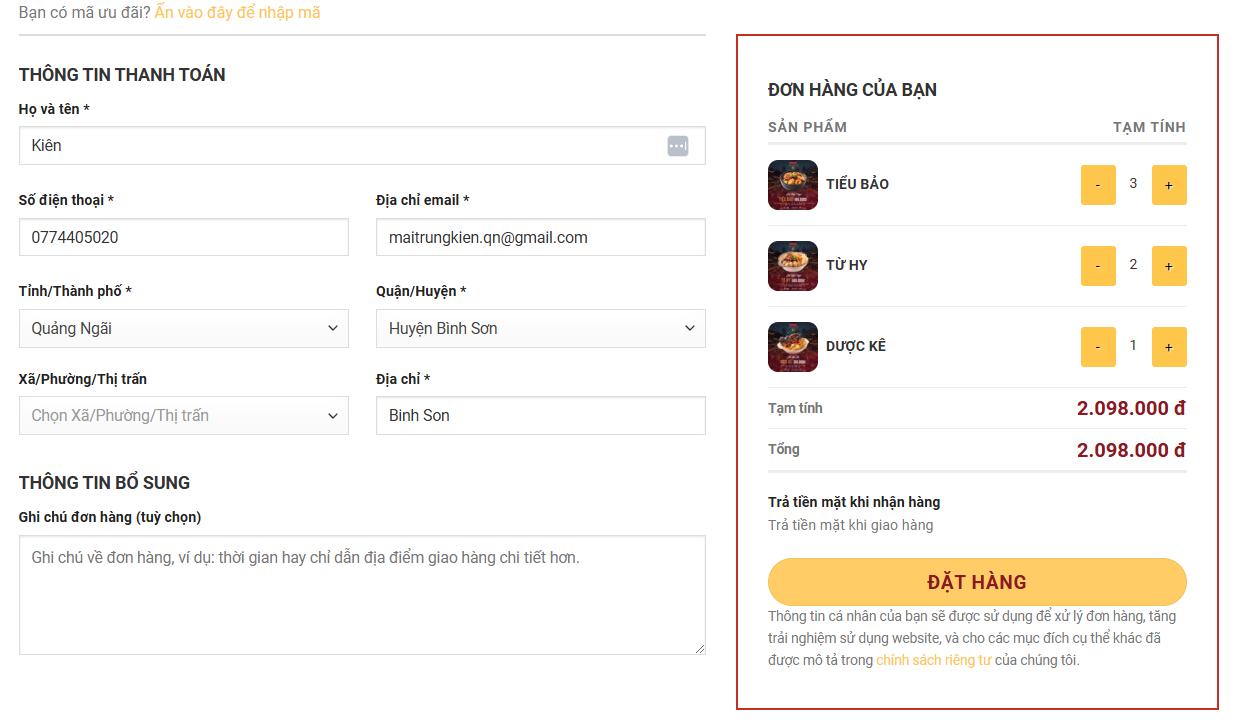
}Sau khi dán đoạn code trên vào file function.php bạn lưu lại và thoát ra ngoài xem thành phẩm nhé, sau khi update cả 2 đoạn code trên thì chúng ta được chức năng thêm ảnh đại diện và thay đổi số lượng sản phẩm trang thanh toán
Thật đơn giản phản không nào, nếu như bạn đang gặp vấn đề thắc mắc thì hãy để lại bình luận bên dưới bài viết này để cùng nhau thảo luận nhé, chúc các bạn thành công.